This post will walk you through building an Android Emulator for the Nook step-by-step in Eclipse and via the command-line. These instructions are based on the
original instructions located at the
nookdevs website.
Pre-requisites:
1. You need to have Eclipse running with the Android SDK. More information on that can be
found here.
2. I'm assuming you are developing in a Linux-ish environment. I'm using the amazing
Ubuntu Lucid Lynx.
3. download and set up the following tools:
smali,
baksmali,
unyaffs,
yaffs2image.
How I Set Up the command-line tools:
smali and baksmali. Description from the developer's site:
"smali/baksmali is an assembler/disassembler for the dex format used by dalvik, Android's Java VM implementation".
1. Download them into your ~/bin/ directory.
2. "chmod +x" the wrapper scripts (smali and baksmali)
3. rename the jar files: smali.jar and baksmali.jar.
cd ~/bin/
wget http://smali.googlecode.com/files/smali-1.2.2.jar
wget http://smali.googlecode.com/files/baksmali-1.2.2.jar
wget http://smali.googlecode.com/files/baksmali
wget http://smali.googlecode.com/files/smali
mv baksmali-1.2.2.jar baksmali.jar
mv smali-1.2.2.jar smali.jar
chmod +x smali
chmod +x baksmali
description: Unyaffs is a program to extract files from a yaffs file system image.
1. download
unyaffs into your
~/bin; chmod +x unyaffs;
mkyaffs2image:
1. download
mkyaffs2image. I downloaded the yaffs2-binary.tar, untarred it and copied yaffs2/utils/mkyaffs2image to my ~/bin/ and chmod +x it.
Okay we have the tools and our environment is ready!
1. I'm assuming you already have Eclipse set up and running with the Android Development Kit. Nook runs on the cupcake 1.5 platform of Android. So first we have to make sure that the Android 1.5 Platform is installed. Assuming you downloaded the Android SDK into your home directory, run:
$ ~/android-sdk-linux_86/tools/android
This will start the Android SDK and AVD Manager. Click on Installed Packages and look for SDK Platform 1.5. If you do not see it, click on Available Packages and download and install it.
2. Grab the original 1.0.0 image from bn.com (mirrored here:
multiupload).
3.Run $ dd if=signed_bravo_update.1.0.0.dat of=signed-bravo-update.1.0.0.tar.gz bs=1 skip=152
This takes a while. You now have signed-bravo-update.1.0.0.tar.gz
4.Uncompress the new file: signed-bravo-update.1.0.0.tar.gz
$ tar xzvf signed-bravo-update.1.0.0.tar.gz
Now you have the uncompressed folder Firmware_Update,
5. Rename bravo_update.dat to bravo_update.tar.gz and extract it.
$ mv bravo_update.dat bravo_update.tar.gz
$ tar xvzf bravo_update.tar.gz
This uncompresses another Firmware_Update folder, cd in to it.
if you pwd, you'll be in Firmware_Update/Firmware_Update
6. Extract root.tgz
this uncompresses a lot of stuff. All of the Android system image actually. Later we will re-compress the system folder to create the system.img
7. Extract system/framework/services.jar with your favorite unzip utility.
I did this from the GUI, right click on file and select "Extract here".
$ cd services
8. disassemble the file classes.dex with baksmai
This create out/
9. vi out/com/android/server/ServerThread.smali
delete the line
(for the vi-newbies, you can search in vi by typing a forward slash and typing in a phrase like "if\-lt", then type dd, to delete the line, and ":wq" to write the file and quit)
10. reassemble the file with
11. Replace the old classes.dex with this re-assembled file:
12. delete the old out/ directory and re-jar the contents of the services folder, but the not the services folder itself.
(I moved the META-INF folder and classes.dex out of the services directory and into the parent framework directory. Removed the empty services directory. Right clicked the classes.dex and selected "compress", and selected as name "services" and type as "jar" file, then I dragged the META-INF file onto the new services.jar. Yes, I know there is a better way, but I'm kind of new to jar files...)
Now we are going to build an android AVD, so we can extract a single file to use back in this system.
13. if your android SDK tools are in your path Run,
android
else find the android command and run it, or run it from eclipse.
This starts the Android SDK and AVD Manager. To create a new AVD, click New...
Name: nook
Target: Android 1.5
Size:
Skin: click Resolution, and fill in 488 x 944
click "Create AVD".
Then click "Details" to see where it was created. It should be at ~/.android/avd/nook.avd
14. unyaffs the system.img and grab a file
cd ~/nook_dev/
mkdir sys_img
cd sys_img
cp ~/android-sdk-linux_86/platforms/android-3/images/system.img .
unyaffs system.img
cp lib/libaudioflinger.so ~/nook_dev/Firmware_Update/Firmware_Update/system/lib/libaudioflinger.so
15. re-create the system.img with the new audio file.
cd ~/nook_dev/Firmware_Update/Firmware_Update/
mkyaffs2image ./system/ system.img
16. Sketchy step where you overwrite the good Android 1.5 platform system.img in your Android SDK with this new one.
mv ~/android-sdk-linux_86/platforms/android-3/images/system.img ~/android-sdk-linux_86/platforms/android-3/images/good.img
cp ~/nook_dev/Firmware_Update/Firmware_Update/system.img ~/android-sdk-linux_86/platforms/android-3/images/system.img
Remember to change this back later if you want to do non-nook related Android Development.
17. run the emulator!
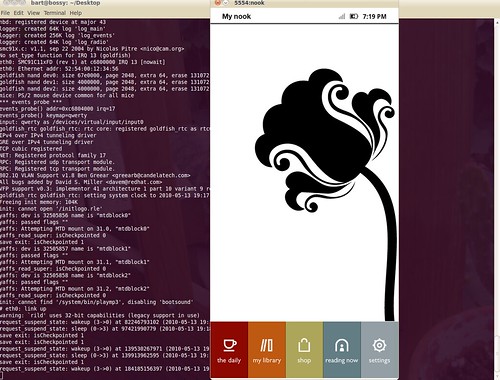
emulator @nook -shell -show-kernel -verbose
 I was able to build an emulator for Nook version 1.2. See my previous post for the prerequisites. Basically you need some utilities installed: smali, baksmali, unyaffs, and mkyaffs2image. You also need the Android SDK installed on your computer.
Here are the steps:
1: download the nook 1.2 soft-root image from nookdevs. For the rest of this post I assume you have copied it into the directory ~/nook_dev/ and we will be working on it from there.
2. extract the bravo_update.dat, cd into it and extract root.tgz
I was able to build an emulator for Nook version 1.2. See my previous post for the prerequisites. Basically you need some utilities installed: smali, baksmali, unyaffs, and mkyaffs2image. You also need the Android SDK installed on your computer.
Here are the steps:
1: download the nook 1.2 soft-root image from nookdevs. For the rest of this post I assume you have copied it into the directory ~/nook_dev/ and we will be working on it from there.
2. extract the bravo_update.dat, cd into it and extract root.tgz